WRITING WITH SCRIVENER, DEVONTHINK AND ZOTERO
As mentioned in a previous blogpost, I use DEVONthink Pro (DTP) as my Information Management system. Basically, this means that I throw all kinds of information, in all kinds of formats, into DTP for indexing and archiving. Be it blogposts, .pdf articles, Word documents, Excel spreadsheets, Powerpoint presentations or plain text files. DTP does it all.
This post won’t cover DTP that in-depth, but rather the proces it is part of when actually producing some kind of writing based on, or including, the information I keep in DTP.
And that’s going to introduce yet another Mac app favorite: Scrivener produced by Literature and Latte.
Scrivener
Now, Scrivener ought to, I imagine, be a writers idea of heaven. I don’t write novels or long form literature. But I have spent the time required in Word to handle 40 to 50 pages more than once. And honestly, it was a pain. My top 2 of personal annoyances include:
- being forced into a sequential writing process; sure, you can copy/paste and see an outline. But moving stuff around? Better not hope it’s too complex.
- the inherent focus on form, not content. I find this even more stressful than looking at blank sequential pages. This might be personal, but I think Microsoft Word sits squarely between being a wordprocesser and a typesetting tool. I dare you to use it with a focus on content alone! So for me, I prefer using Word as a typesetting tool in the very end of the process.
Not so with Scrivener. In my perception, Scrivener is all about the content. Sure, you can muck about with fonts and margins. But it’s not something that jumps into your face or is required. Choose a font. Make your headings bold. Write.
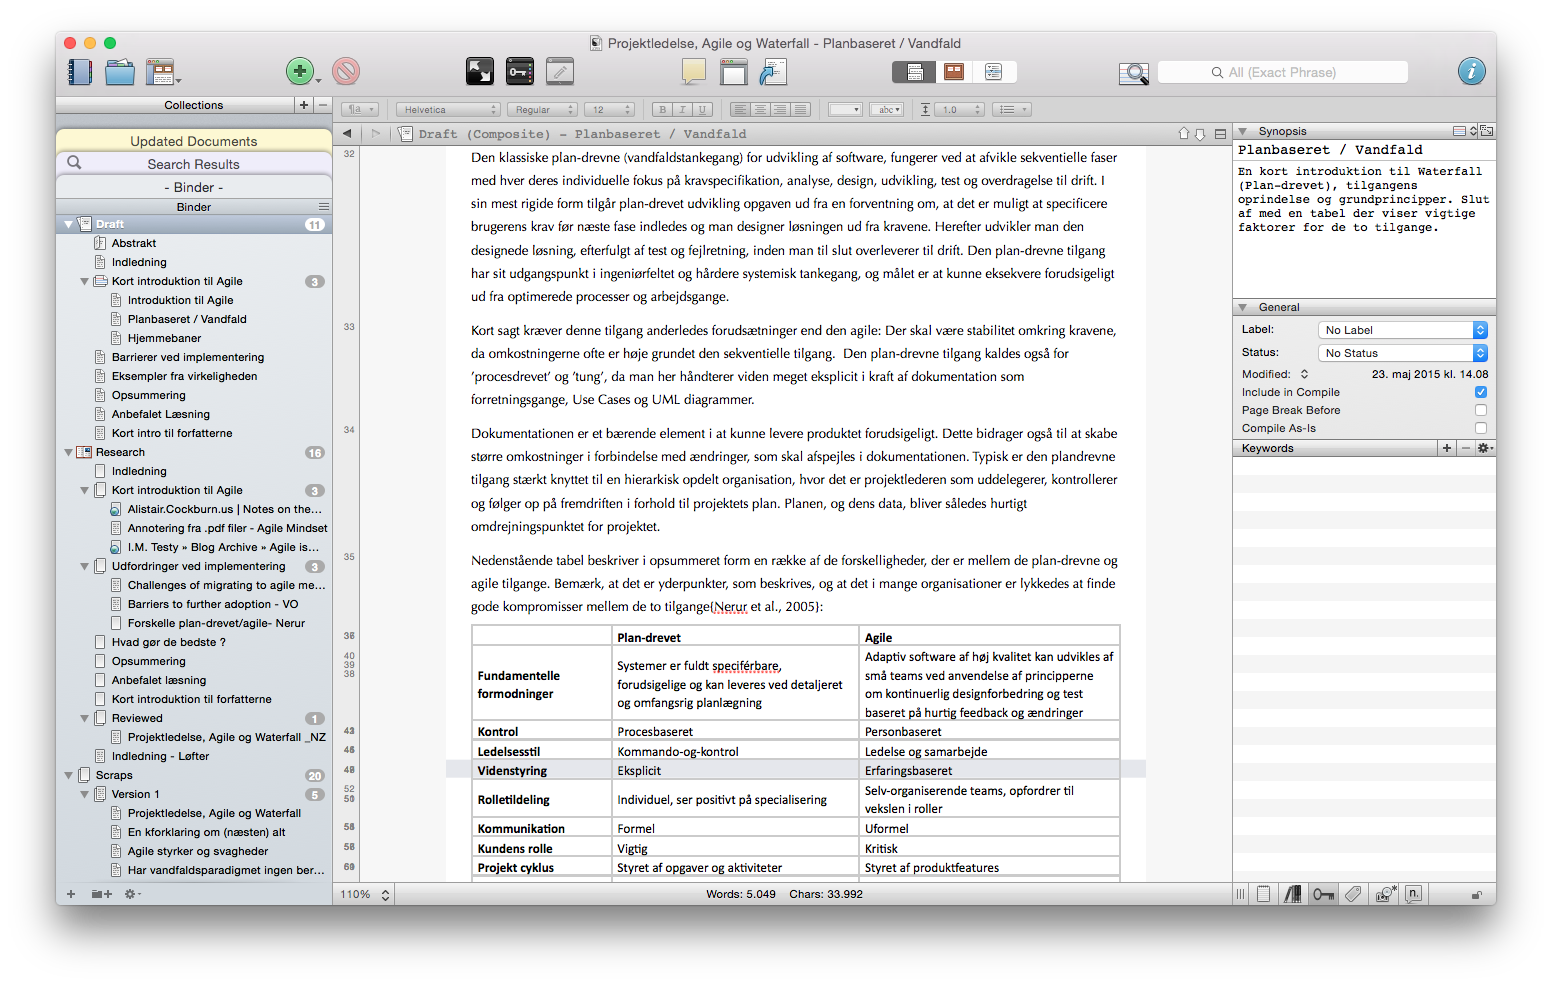
I’m just going to explain the primary parts of the interface along with the ‘compile’ feature, to give you an impression of Scrivener. It won’t be in-depth per se, but should give you a general idea and inspiration as to trying the app. Yup, free trial at the Literature & Latte site.
The Binder
On the left hand side is the Binder. Basically, it immitates how a regular paperbased binder would function. You can create new collections (also based on search criteria) with different colors to supplement the ones you see on my screenshot (Updated Documents, Search Results and Binder).
Below the collection titles you can see the contents of the selected collection. And this is one of the cases where you have to think differently from Word. Because what’s presented here under the Draft top level, are Scrivenings or, pieces of text, with a title. As you can see, these can be placed in a hierarchy. But the really neat thing is, that they can be dragged around as well. This makes toying around with the contents damn easy.
Oh, initially, the Binder will be split into two distinct parts: Draft and Research. The Draft part is where you will put your text, you product, so to speak. The Research part is where you can put images, .pdf’s, Word documents and other goodies to keep them close while writing.
The Text Window
- In the middle, we have the text window. And this is where it gets special. Because the text window has 3 different view modes:
-
Scrivenings which is what you see on the screenshot above. This window can show one scrivening or several scrivenings in one long view. See where the cursor is at in the screenshot? This is where the first scrivening ends, and the next begins.
-
Corkboard which is exactly what you might think. It’s a corkboard where the individual pieces of text are represented with their title and outline. I use this a lot for brainstorming and shoving around different scrivenings, it make it really easy, and a lot more visual, to discover the right contents and sequence of your sections.
-
Outline is exactly what it says. It’s an outline which also shows the Synopsis, Label and Status for each part of the outline. Each part translates to the Scrivening you have selected in the Binder. You should know Outlines so I will not go into detail about that part.
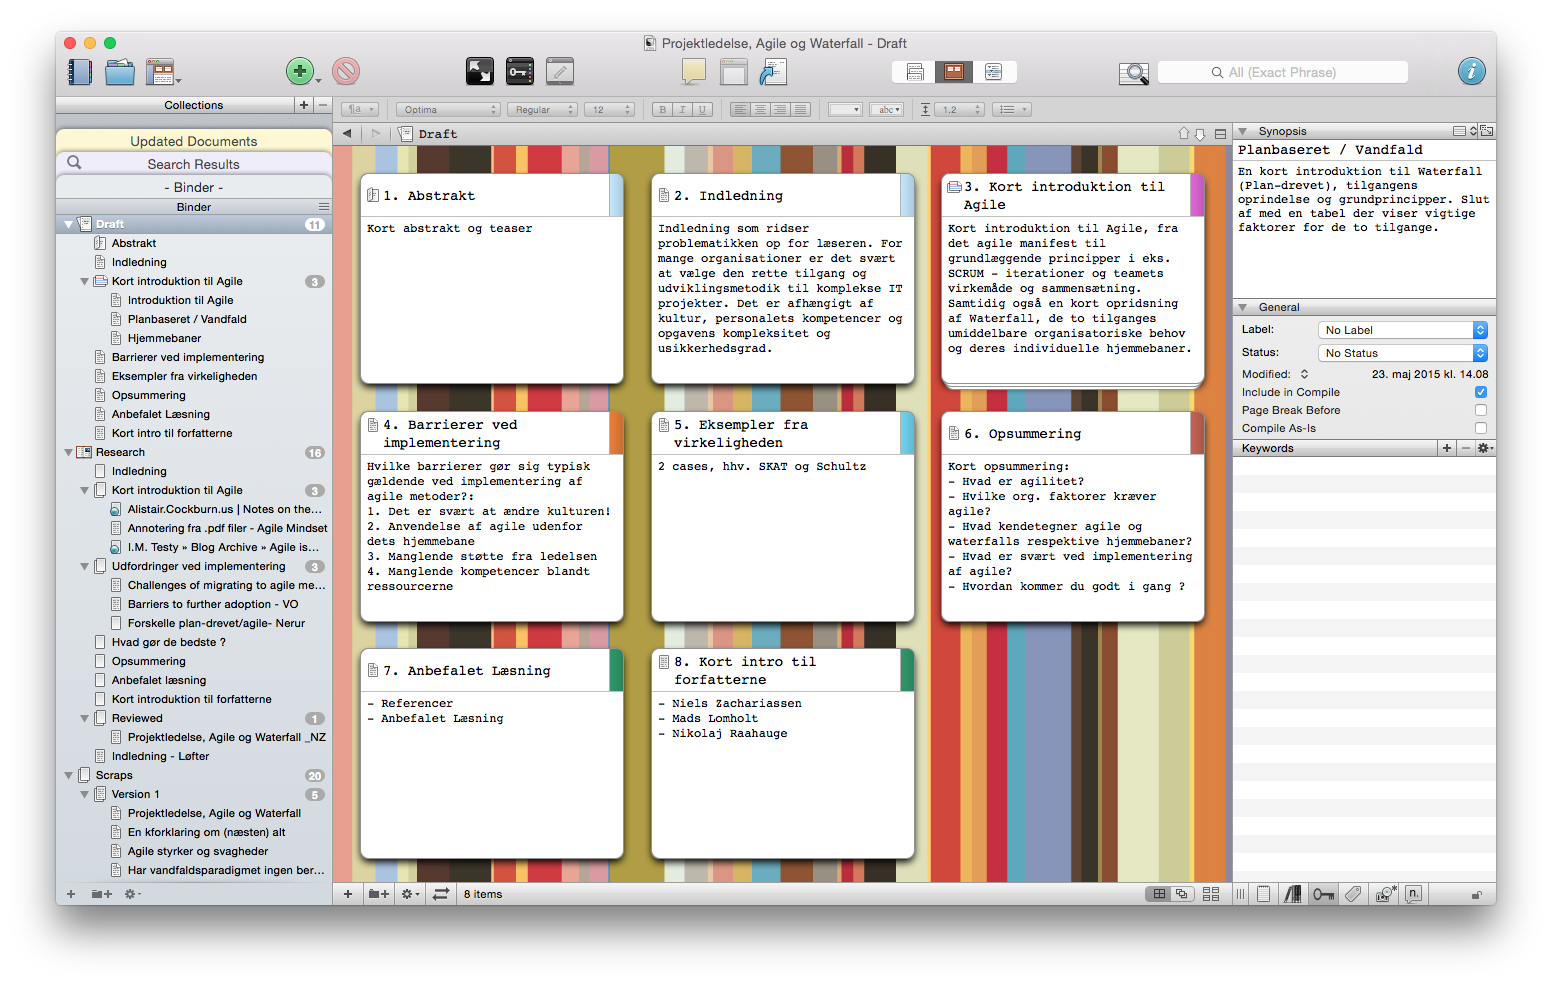
Now, a neat thing about the text window is that it can be split. I use this a lot when I am writing parts that are based on other parts of the work I’m doing (for example, I find it useful with a whitepaper to have the Introduction in the top and the Summary/Conclusion in the bottom). Might also be research material in one of the windows.
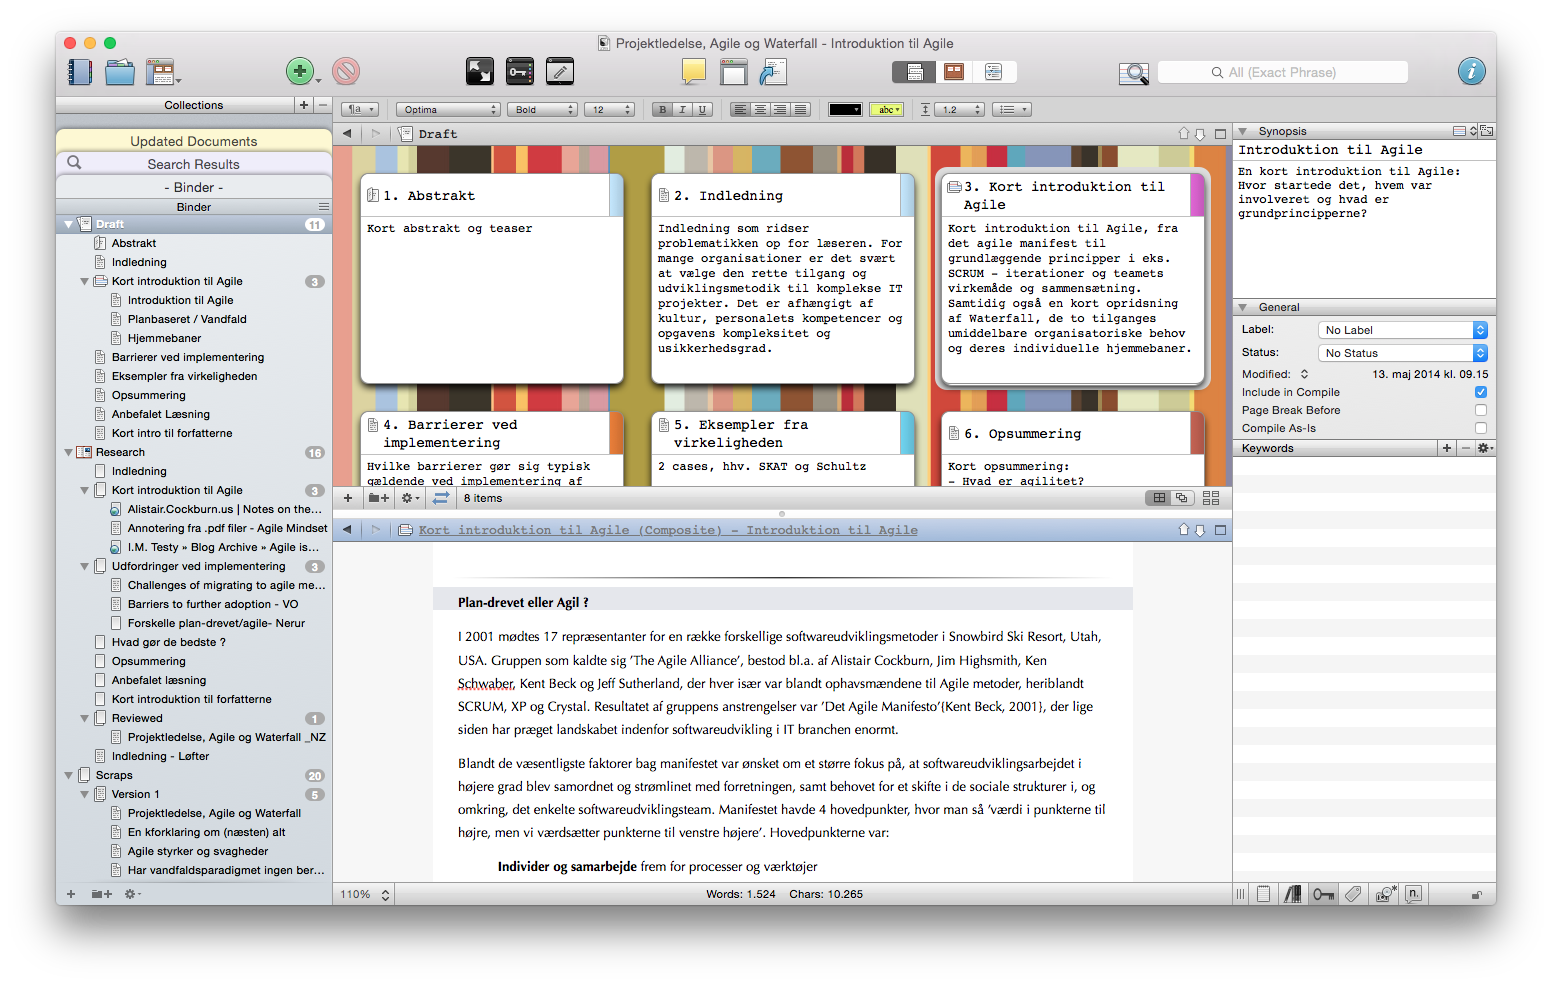
And guess what, it’s your choice (Your choice, your choice, peace, or annihilation - sorry, the A Perfect Circle cover of this excellent protest song was on the turntable while writing this) whether the windows you have split into are in Scrivenings, Corkboard or Outline mode. Fancy an outline or corkboard in the top window, while writing in the bottom one? No problem, Scrivener’s got you covered.
The Inspector
On the right hand side, is the inspector which, in classic Mac style, can show many different types of information (the contents of the Inspector changes with the selected Scrivening). Standard has the Synopsis on top, followed by a General part which keeps track of Label, Status, Modified Date, wether it should be included in the compile, if there’s a line break before (when compiling) and if it should be compiled ‘as-is’.
Below the General part, different views can be selected: Notes, References, Keywords, Custom Meta-data, Snapshots and Comments & Footnotes. Going in-depth with these will explode the scope of this post, plus, they’re pretty self-explanatory.
Of course, the Binder and Inspector can both be hidden, leaving the text window the only window.
Compiling
Remember when I said that Scrivener focusses on content more than form? Now, with all the different view modes and the ability to shift your scrivenings around, Scrivener uses its own file format, to keep all the relevant data.
Also, I do recognize that typesetting is important for the final product. It’s just that I would not find Scrivener to be the best tool for this. I’d rather use Final Draft, Word or Open Office for this part.
So how to actully export your material from Scrivener? The answer in the world of Scrivener is: Compiling. As seen in the screenshot below, there are indeed a lot of options available, when performing the compilation of your writing.
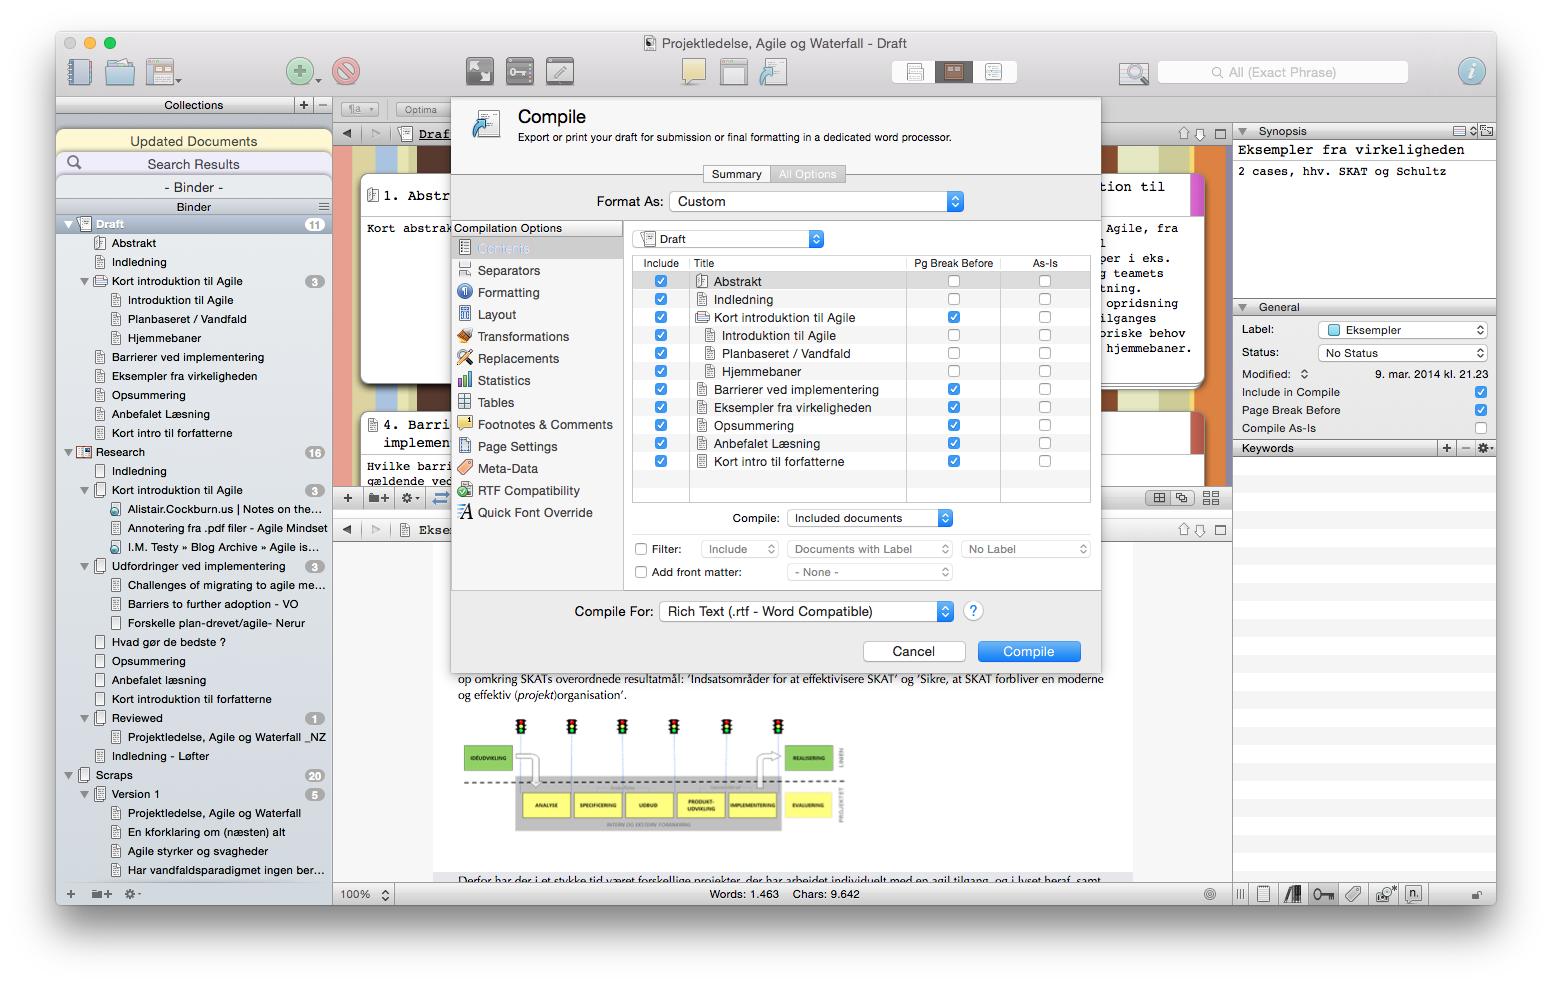
Scrivener supports an impressive array of formats, from Plain Text, RTF and Word and Open Office variants, to Final Draft, ePub, Kindle and iBooks. Add in Multimarkdown support which can be compiled to LaTeX, HTML and XML and you’d be hard pressed to require further formats.
A writing and typesetting process
So, that was an introduction to Scrivener. Not overly deep but it should be enough to whet your appetite and send you off to download the trial version.
I am sorry if what got you reading was my mention of DEVONthink Pro, because there hasn’t been much of DTP so far. But let’s outline my actual process (please note that it’s iterative, it’s not a one roundtrip sequential thing):
- From DEVONthink to Scrivener is the first part. And this part can really take a while, since this is where I identify the relevant material to be used. Sometimes it’s PowerPoint presentations, other times it’s annotated pdf’s or the annotations themselves that I go through (and that’s where my previous workflow really shines).
- Writing in Scrivener using the outline and research material gathered in the previous step. This often leads me to do more research or to remove materials from the Groups and Smart Groups in DTP as I get more into the specifics. I also use Zotero in this part, since it’s my bibliography manager, so I use it for citations.
- Citation scanning with Zotero comes next. Basically, I compile the as RTF from Scrivener and then use the RTF Scan feature of Zotero to create the proper citations and the bibliographic reference.
- Typesetting with Word is the final part, as I haven’t concentrated on the looks of the document so far. Setting fonts, margins and sizing images correctly is all a part of this.
Sounds great, right? Let’s dig in for some more details.
From DEVONthink Pro to Scrivener
As I’ve mentioned in my other post and in the introduction of this one, I use DTP for my collecting and managing my research material. So how do I get from a big collection of all sorts of stuff, to actually using it in my writing? The answer to that is using Groups and Smart Groups in DTP. Basically, when the subject of my writing project has been decided (like the whitepaper on Agile Software Development you’ve seen mentioned in the screenshots; hint, it’s in danish), I start searching and organizing my data in DTP.
This gives me a rough sketch of the outline of the writing project. And then I create an outline with Groups and Smart Groups. Groups in DTP are basically folders you can use to structure your content. And when I say Smart Groups, think Smart Groups in Mail. You punch in the search criterias and DTP will create a Smart Group folder with the contents that matches the search criteria.
In this screenshot you can see a very simple example:
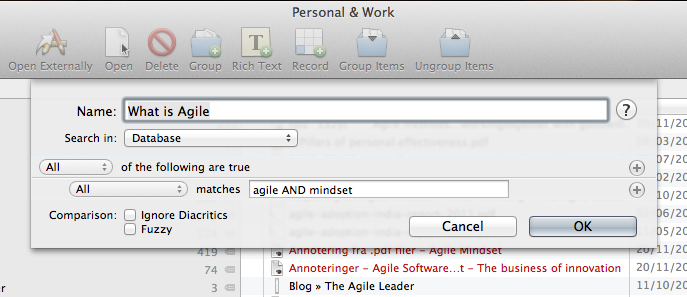
This will produce Groups in DTP with contents that matches my searches, and then I start pruning the results that come up. So basically, I use a combination of manual searches1 and smart groups to locate the juicy stuff. This is also where the strength of DTP’s See Also function comes in. The information quests in DTP can be pretty damn awesome as the See Also functionality guides you through all the material you’d long forgotten. Ah, serendipity incarnate!
Now, next up, is the decision to drag’n’drop or import the research that I find relevant to Scrivener. And when I say relevant I mean the stuff where having it in a split window, will provide a benefit while writing. Otherwise, I find that I might as well just CMD+Tab to DTP. It’s also worth remembering, that the material you choose to drag over to Scrivener, will increase the filesize and save/export times (not that they’re crazy or anything).
Writing in Scrivener
As I’ve mentioned, when I do my writing in Scrivener, it’s sometimes with split windows, other times I use the fullscreen distraction free writing mode. It all depends. When I encounter a part where I need to put in citations, I CMD+Tab to Zotero if I need to remember the author, or typically, the year.
Then back again to Scrivener and then I write the citation like in this form which will be recognized by Zotero when performing the scan: { Boehm, 2004}.
There are pretty good guides out there showing how to do it in different ways, like this one or this one, but since I’m not a historian doing very complex research and loads of citations, I find the above way to be the easiest.
UPDATE: The lovely thing about Twitter (and the internet): It’s the perfect liquid network! Not long after publishing this post, @s_margheim tweeted that I should try his ‘Zotquery’ plugin for Alfred, which makes querying and getting cites from Zotero a blast. You should definetely check it out if you’re an Alfred user, it really rocks. Start right here at his Hackademic site which has loads of good stuff. Also, if you need more control and details in how your cites are put together, this Zotero plugin helps you get exactly that2. Instead of scanning RTF it works with ODF, and one of the good things about that, is that it’s available to all through OpenOffice or LibreOffice.
Citation scanning with Zotero
Once I’ve exported the file in RTF format from Scrivener, I use a feature of Zotero called RTF Scan. And, not surprisingly, it does exactly as you’d think. It scans the document you select for ‘codes’ like the one above, substituting them with proper citations (whatever citation style you prefer, Zotero should support it and inserting a Reference list in the end of the document. A neat thing is that Zotero will save the results to a new file of your choosing.

Typesetting with Word (or OpenOffice or Pages)
Now comes the final step. Typesetting. Yup. Typesetting. Sometimes I enjoy it, but most times I find that it actually facilitates procrastination. I’ll simply start diddling with the form, instead of producing content. But the beautiful thing about this process is that all you need is an application that can read RTF. So you can use Pages, Nissus Writer, OpenOffice, Libre Office or Word, for that matter.
Of course, if you want to, Scrivener can help this proces along with some of its features when you ‘build’ the compile. But that’s a story for another day!
Now, seriously
I honestly do recommend Scrivener, especially for more technical pieces, where you need to throw things around or go about your writing in a more complex way. For me it enables a different way of working with the text and its structure.
One last neat tip, is that Scrivener can automatically export your individual Scrivenings when you quit the application. I use that to put the text into a folder in my Dropbox account for use when I’m on the go with either my iPad or iPhone. And what happens when you fire Scrivener up next time? It actually syncs the changes you’ve made. Enough said, go try it out !